Fixed Calendar Elements
On the left-hand side of the embedding editor screen for your calendar, you will see a box divided into four tabs labeled "Display", "Custom Colors", "More Colors", and "Embedding." The "Display" and "Embedding" tabs control how your calendar looks.
The "Display" tab
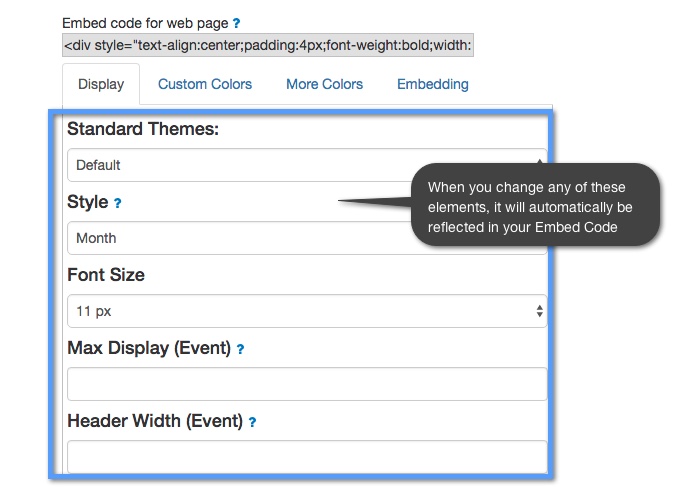
When you click on the "Display" tab you will see a short list of these calendar elements that you can change:
Standard Themes — In this drop-down menu you can choose from several default color themese that we provide you or you can choose to use your own custom color theme for your calendar.
Style — In this drop-down menu you can choose what style of fixed format calendar you want to embed. You can choose from Day, Week, Month, Year, Event and Side-by-side calendar views. Learn more about calendar views.
Font size — You can choose what size you want your event text to appear in your calendar.
Max display (event) — This feature is only for your embedded fixed calendar when it is in event view. You can choose the maximum number of days that will show when your calendar is in event view.
Header width (event) — This feature is only for your embedded fixed calendar when it is in event view. You can choose the width of your header in pixels when your calendar is in event view.
In the image below, we show what each of these elements look like on your calendar embed editor screen:

You can modify any of these settings and the changes will automatically be reflected in your fixed calendar embed code. Once you have the settings to your liking, you can copy your embed code.
The "Embedding" tab
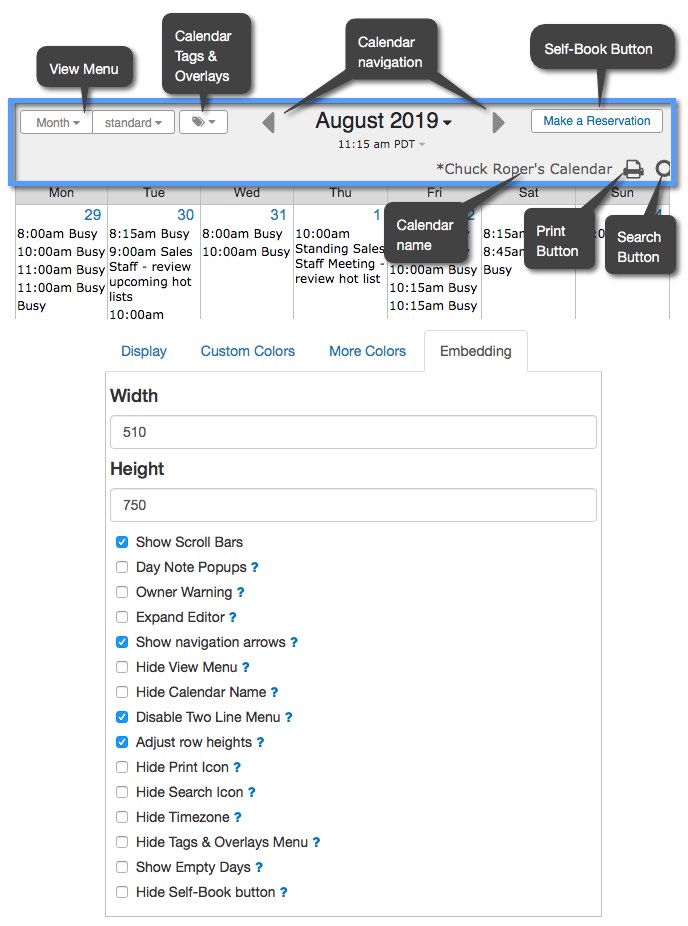
In the "Embedding" tab each of the listed features represents an element that you can choose to have or not have on your final embedded calendar (such as the "print" button). You can scroll over the blue question mark for each one of these features to see a tool-tip explaining what that feature does in your calendar.
In the image below, we show each feature as it’s listed at the bottom of your embedding editor screen and the corresponding feature as it shows up on your embedded calendar.

