Calendar Overlays
Calendar Overlays let you create a combined view of your calendars by layering more calendars on top of the master calendar. This means that you can have separate calendars with different events, but you can combine your calendars as Calendar Overlays and see all of your events at once.
Note: The calendar overlay feature is available only to paid accounts.
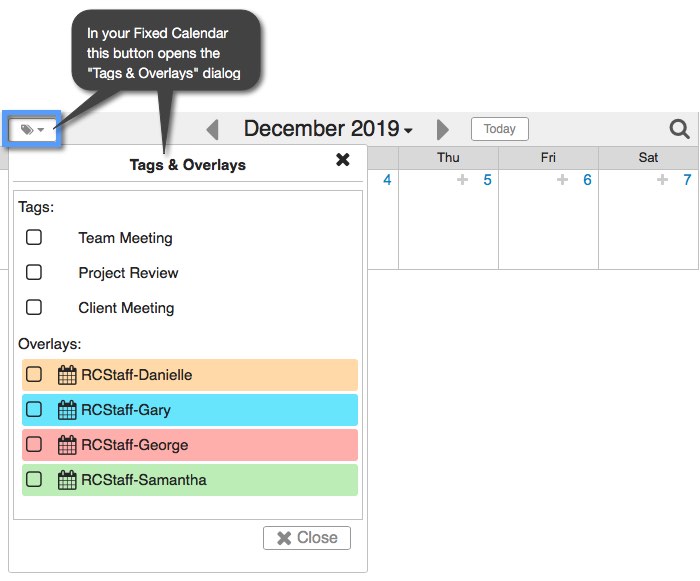
In your fixed calendars and responsive events you can add an an extra element of interactivity to your embedded calendar by allowing your visitors to turn overlays on and off. Visitors can turn your calendar's overlays on and off by checking the boxes next to the name of the calendar overlay on the left side of the "Tags & Overlays" dialog.
Whichever overlay display choices made during this visit only stay during that visit — they don't change what other people see when they visit that calendar, or the calendar's settings.
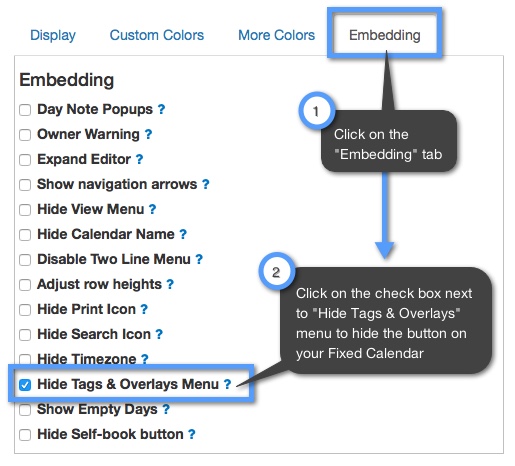
However, if you don't want to allow your visitors to turn overlays off and on you can turn this feature off in the "Embedding" tab.
Overlays in Fixed Calendars
When you have overlays enabled in your embedded calendars there's a "tag" icon button that appears at the top of your calendar. Your visitors can click on this button to see a pop-up dialog of the "Tags & Overlays" dialog. In this dialog visitors can toggle overlays off and on in your calendar (as well as event tags). See the image below:

To disable the "Tags & Overlays" button at the top of your embedded calendar follow the steps in the image below:

Overlays in Responsive Events
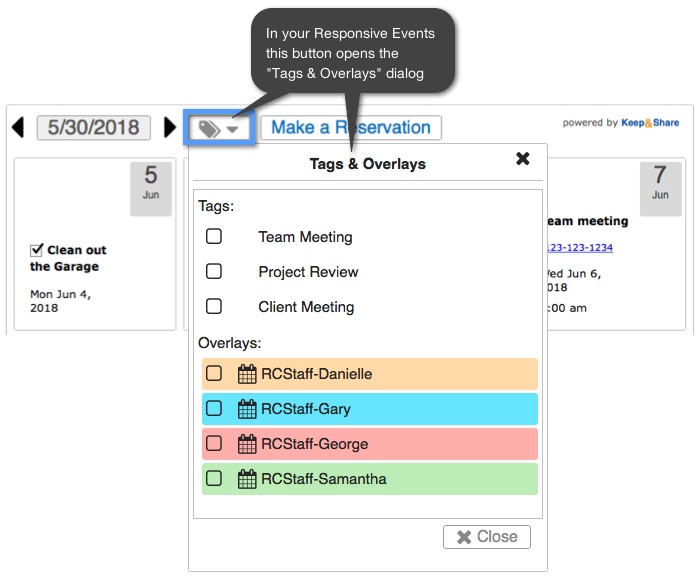
The "Tags & Overlays" button is only visible in your responsive event views and not your responsive calendar views. Like the fixed calendar, the "Tags & Overlays" button will appear at the top of your embedded responsive events. See the image below:

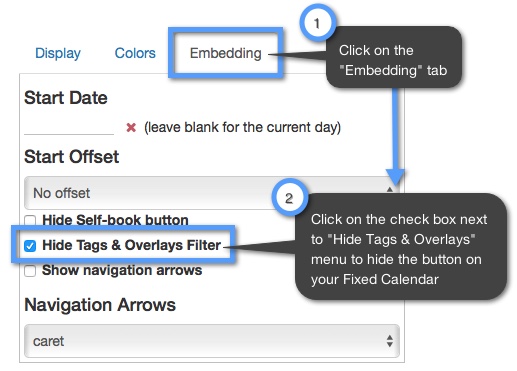
To disable the "Tags & Overlays" button at the top of your embedded responsive events follow the steps in the image below:

